Thursday, September 9, 2010

It's a Bucket of Charcoal Briquettes!
You Will Need:
1 or 2 5-Gallon Buckets with Lids
1 to 2 Bags of Charcoal Briquettes
and
The Printed PDF
I haven't been able to confirm an expiration
date anywhere for the briquettes.
I would recommend using them within 5 years,
but if you have different information than
I was able to find, please let me know!
The Document below says that Charcoal properly stored
can last Indefinately!
Charcoal Document PDF:
I would recomend printing the page and storing it inside of
your charcoal buckets.
This Document on Charcoal was sent in by
Mel Blocks from the Homeland Security Website.
It will answer any of the questions you have about storing
and using Charcoal.
Mel Blocks YOU ARE AMAZING!
Thank You for sharing such valuable information with us!
Did You Know . . .
That 1 Bag of Charcoal Briquettes will make it possible for
 you to cook 1 Meal a Day for a Whole Month?!?
It's a great storage item to have on hand.
Add a couple bottles of starter fluid and you're good to go!
Don't Forget the Matches!
Here's the PDF:
Raspberry Nugget Pancakes!
This is the EASIEST recipe
I think I've ever posted and it's
COMPLETELY
Shelf Stable!
I use the Pancake Mix from the Dry Pack Cannery
and I add the Raspberry Nuggets
(which I purchased from Blue Chip Group)
and that's it!
I love the pancake mix from the cannery!
You can make Pancakes and Waffles using the same mix,
and the nuggets come in 4 different flavors.
Raspberry, Blueberry, Apple Cinnamon, and Cranberry!
Here's the link for the Nuggets:
AMAZING!

It's Official, Schools Back In Session!
The kids want to play as soon as schools out but...
Unfortunately . . . That's Not Exactly
What MOM Has Planned!
Chores Need to be Done, Scriptures Read,
Showers Need to be Taken, Piano Practiced,
and for SaNiTy Reasons . . .
We all need some kind of ROUTINE!
This little door hanger will let friends know
if it's
"Time for PLAY"
or
"Time for WORK."
Here It Is:
Stop and Go Door Charts PDF
Print the PDF.
Laminate the door hangers.
Punch a hole in the tops.
Tie a ribbon through the hole,
and Hang it from your door knob.
Fast, Easy, and Effective!

And the best part of all . . .
I don't have to feel bad anymore
when friends come over to play and my boys
aren't quite finished with their jobs.
Their friends can see the bright-colored signs
from the sidewalk so they don't even have to walk up the stairs!
It's actually been a great incentive for my boys to get
their jobs done early so they can hang the
"GO"
sign up before any of their friends even get the chance
to do a drive by!
It's a
WIN WIN
at my house!

OUr Get READY Box

Trying to get kids ready in the morning can sometimes
feel like you're trying to herd chickens!
Things can definately get to be a little bit
CrAzY!
You try not to nag . . . but YOU DO, because if you don't
say anything, your little one's are likely to go
for days without brushing their teeth or taking a shower.
This little box has saved my SaNiTy on more than one occassion.
It's called the
Get Ready Box!
Here's how it works . . .
First of all, I made each of my boys a box of their own
in their color using a plastic pencil box.
They have a few different sizes.  I used the smaller one,
but if I had a girl, I might consider getting the larger one.
I filled the box with everything they would need to get ready
in the morning, including:
Toothbrush
Toothpaste
Hairspray
Gel
Lotion
Q-Tips
Brush
Comb
and
Deoderant
My boys have used deoderant since they were two years old!
I know you're probably thinking . . .
"What is wrong with this mother?"
Let me explain.
They were going through the motions but not actually
putting any deoderant on.
The safety seal was still in tact and wasn't removed until
they were older and really needed it.
They had no clue!
My reason for doing this is simple . . .
Teenage boys can create smells words can't describe so I wanted
to get a headstart on teaching this good habit . . .
for the sake of all mankind!!!
If they take a shower and do everything in the box,
every morning, they're good to go!
The Get Ready Box has a lot of perks!
No more gooey toothpaste stuck to the
bottom of the bathroom drawer.
No more nagging!
The box lets them be in charge.
Once they've done everything in the box . . .
they know they're done!
It's their responsibility to let me know if they are out
of toothpaste, hairspray, deoderant . . . etc. and
they are in charge of keeping their box clean.
If you can't find a brush or box in their color,
just tie a small piece of ribbon in their color to the items.
Color-Coding is a parent's greatest tool!
If a toothbrush is left out . . . you'll know in seconds
who it belongs to.
Each of my boys have two drawers in the bathroom.
1 for their Get Ready Box and 1 for their towels.
Note:
If you have toddlers, you will want to be there with them,
the whole time.  I can only imagine what they could do with the
contents of this box if left alone.
This is a great time to train and teach them.  They actually like
help and try to do the big kid stuff when they're that age.
The school supplies are on sale . . . EVERYWHERE right now,
so you shouldn't have a problem finding the pencil boxes.
I purchased the rest of the stuff at the dollar store and Walmart.
I refill the hairspray and Q-tips at home to save money.

Family Activity - Clean Room Relay!

Today's Family Activity Is:
A Clean Room Relay!
We are on the final countdown before school starts
and having a clean room will make mornings, homework,
and everything else go so much smoother.
I love it when we can make everyday jobs seem like a game.
It's not always the first thing we try, usually because
we're exhausted just trying to keep up with everything
and everyone.
Before long we find ourselves getting into the nagging rut,
BUT when we get a little creative . . . great things can happen!
Mary Poppins was a PRO at this concept.
That whole spoon full of sugar thing was GENIUS!!!
The kids go to work without even realizing
what's happening!
I LOVE IT WHEN THAT HAPPENS!
Here's How It Works:
You will be given 8 Tasks.
Each task will be given one at a time.
After each of the tasks is completed
you will earn a number of points.
If you have small children you may want to:
Divide into two teams so that
you can help little ones with their assignments.
Each time a task is completed . . . 
A treat can be given along with the points.
This will help to keep
interest and incentive throughout the relay!
Music always makes things more FUN as well.
Here are the Clean Room Relay Task Cards:
#1
Make My Bed
8 Points

 #2
Pick Up My Clothes
5 Points

#3
Pick Up & Put Away My Toys
(Or Other Out-Of-Place Items)
5 Points

#4
Take Out the Garbage
4 Points

#5
Straighten Dresser and Nightstand Tops
6 Points
#6
Spotwash Fingerprints and Doors
5 Points
 #7
Dust
5 Points

#8
Vacuum
6 Points

You may want to set up a little treat stand
or a mini store for the kids to spend the points they've earned,
or you can give small treats or privileges along the way
and have ICE CREAM CONES for the REWARD!
Here's the PDF:
Clean Room Relay Cards PDF
Have a great time
working and playing together.
Remember it's a game . . . 
MAKE IT FUN!
Take pictures to add to your family scrapbook,
the evidence of smiling faces
will show just how much FuNworking together can be!
Here's the Recipe:
Ingredients:
Crust
1¼ cups all-purpose flour
1/2 cup quick cooking oats
1/2 cup packed brown sugar
1/2 cup ground pecans
1/2 tsp baking powder
1/2 cup butter, melted
You could make the crust into a mix and make several ahead of time!
It's a great mix to have on hand!
Topping
1½ cups pecan pieces
3/4 cup brown sugar
2 tbsp corn syrup
Filling
2¼ cups canned pure pumpkin
1 can Regular or Low Fat Eagle Brand®
sweetened condensed milk
1/4 cup white sugar
1/4 cup brown sugar
1/4 cup all-purpose flour
3 eggs
2 ½ tsp cinnamon
1½ tsp vanilla extract
1 tsp ground ginger
1/2 tsp allspice or mace
Preparation:
Toss all ingredients together except butter.
Add melted butter and rub between fingers
until evenly combined.
Press into bottom of parchment lined 13" x 9" pan
and bake at 350°F for 10 minutes.
Topping :
In small bowl combine topping ingredients; set aside.
Filling :
With electric mixer beat pumpkin and sweetened condensed milk.
Beat in remaining ingredients until smooth.
Pour over prebaked crust.
Bake :
15 minutes; remove from oven and sprinkle
with prepared topping.
Return to oven and bake another 25 minutes
or until set.
Cool completely on wire rack.
Chill.
Holiday Preparation Calendar

September 1st WeekPut up Fall decorations
2nd Week
Update Christmas card address list
Order Christmas address labels
3rd Week
Decide on Christmas budget
Decide what Christmas traditions this year
Decide on holiday travel plans
4th Week
Create a Master Christmas Gift list
October 1st Week
Put up Halloween decorations
Work on homemade Christmas gifts
2nd Week
Buy supplies for Halloween costumes
Shop for girl's holiday dresses
3rd Week
Buy pumpkins for Halloween
Family Christmas picture taken
Order copies of family pictures
Ask family for Santa wish lists
Work on Homemade Christmas gifts
Start Christmas shopping
4th Week
More Christmas shopping
Enjoy Halloween!
November1st WeekTake down Halloween decorations
Put up Thanksgiving decorations
Send invites for Thanksgiving if at our house
Christmas shopping
Write family Christmas letter
Make copies of Christmas letter
2nd Week
Inspect/put up outdoor Christmas lights
Inspect Christmas decorations
Buy stamps for cards/letters
Calendar holiday activities/parties
More Christmas shopping
Decide holiday party menus
3rd WeekSet up/decorate Christmas tree
Find Thanksgiving tables, chairs, utensils
Decide on Thanksgiving table decorations
Shop for Thanksgiving meal items
Wrap/box relative gifts
4th Week
Enjoy Thanksgiving
Give relatives Christmas gifts
Take down Thanksgiving decorations
Set up advent calendar and nativity
Finish online Christmas shopping
December
1st WeekAddress and sign Christmas cards
Shop for stocking stuffers
Mail all packages & cards
Wrap presents and listen to Christmas music
Tradition: Read nightly Christmas stories
Tradition: Go to 1st Presidency Devotional
2nd WeekTake kids shopping for siblings & teachers
Kids wrap gifts for siblings & teachers
Tradition: Read nightly Christmas stories
Tradition: Go visit temple lights
Tradition: Go work at homeless shelter
Tradition: Make Christmas goodies
3rd WeekPurchase food for Christmas breakfast/dinner
Tradition: Go caroling
Tradition: Read nightly Christmas stories
4th WeekMake Christmas Eve dinner
Tradition: Read the Christmas story
Enjoy Christmas Day and family
Shop after Christmas sales
Purchase next years decorations
Plan New Year's activities
Tradition: New Year's Eve countdown

Complete Grocery & Food Storage Planner

Or

I've created a do-it-yourself Complete Grocery & Food Storage Planner to get me, and you, organized. Food storage purchases should be a regular part of your grocery shopping. So, this organizer will include food storage (short and long-term), emergency supplies, grocery lists, and a place to store coupons. I'm combining it all. Everything at your fingertips. Keeping it simple.

Step by Step Guide
1. Gather Materials

1 1/2” zipper binder (about $10 WalMart) or a clear-front binder
zippered pencil pouch
calculator
scissors
pencils or pens
24 tab dividers (will depend on how many sections you want)
35+ plastic baseball card holders to hold your coupons (about $6 at WalMart, up front by the registers and baseball cards)


2. Make Tab Dividers
Before I labeled the tabs, I put my papers behind the dividers, switched them around several times until I decided what order I wanted to use them. I changed the order again so the picture above is already outdated! Use any order that works for you. Then label the tabs.
TAB: Menu Plan -
  1. Set aside some time each week to plan your grocery menu's by studying your current grocery ad and looking for sale items. Put this on your Weekly Menu Planner. Practice each week preparing one meal using mostly non-perishable foods. Breakfast is a great place to start.
  2. Record the groceries you need to purchase on your GROCERY LIST.
  3. Add some food storage or emergency items to your GROCERY LIST from your Monthly Food and Home Storage Calender (click on the picture) or check your INVENTORY LIST.
  4. I keep a Post-it note on the refrigerator and have the family write down other items we run out of at home. When my kids say, "Mom. We're out of ...." or "I need," I say "Write it down!" I add these items to the GROCERY LIST as well.
  5. Try to buy items as when they go on sale. Check outPinchingYourPennies.com, FoodStorageDeals.com (UT) orGrocerySmarts.com. You can use another service in your area such as SisterSavings.net (AZ and UT). Read tips from theCoupon Lady about purchasing habits.
  6. I also keep my SAM'S CLUB EACHES PRICE list here. You could make one for Costco too. I check this to know if I can beat Sam's prices at other stores.


Monthly Food and Home Storage Calendar
TAB: Storage Plan -
  1. Here is where I keep my annual Monthly Food and Home Storage Calendar (I'm revising it of course as I do more research). It doesn't have to be set in stone, but having an idea of what to gather each month will keep you focused.
  2. Keep your Food & Home Storage Supply List here.
  3. Keep a Disaster Supply Kits list here for emergency supplies. This list was created by Leslie Probert, author of "Emergency Food in a Nutshell" for the 2006 BYU Women's Conference.
  4. Keep a copy of the LDS handout All Is Safely Gathered In Family Home Storage, 2007 here as well to keep focused on the LDS Church guidelines.
  5. Newbies: this may be an area where you keep food storage ideas from the internet or elsewhere. Maybe you are interested in building some rotation shelves, and need a place to put those ideas. See How to Make a Self-Rotating Food Storage for Canned Goods
TAB: Bulk Buying - I keep a copy of the LDS Home Storage Centerorder form here so I can add what I need to buy on my next trip. If you shop at other retailers, put their order forms here as well. 
TAB: Inventory - Here is where I keep my food storage INVENTORY sheets. I have stopped using an online program, and am now doing it by hand. It is much simpler, and believe me, I do a lot on the computer.

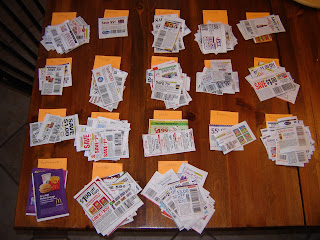
Sorting Coupons for the first time with Post-It Notes
Coupons - If you save coupons, put them in plastic baseball card holders. You will need tab dividers to put them into categories. Within each category I have a page or subsection that I labeled in the top right hand corner with my DYMO label maker:
  • BABY
  • BAKING (Canned Milk, Fats/Oils, Mixes/Frosting, Packaged, Spices/Flavorings, Sugars/Grains, etc. )
  • BEVERAGES (Juices, Water, etc)
  • BREAKFAST (Cereal, Cooked Cereal, etc.)
  • CANNED (Fruits/Vegetables, PB/Jelly, Soups, etc.)
  • CONDIMENTS
  • FROZEN
  • HOUSEHOLD (Cleaners, Office, etc.)
  • PAPER/PLASTICS (Paper, Plastic/Foil, etc.)
  • PET
  • PHARMACY (Adult Med, Kids Med, First Aid, etc. )
  • PHOTO
  • REFRIGERATED (Bakery, Dairy, Deli/Cheese, Produce, etc)
  • SNACKS (Candy/Gum, Snacks, Dried Fruit, etc)
  • TOILETRIES (Deodorant/Shavers, Eye, Face/Makeup, Feminine, Hair Products, Lotion, Mouth, etc.).
You may want more or less categories. There are so many ways to do this. I am not an expert. My advice is to clip healthy foods, and be open to different brands. 

Organizing Coupons

My little one's version of organizing coupons

3. Put it all together and you are on your way! Keep it Simple. I take my binder with me everytime I go out just in case I'm in the neighborhood of one of my stores. 

The BEST French Bread

If I had to choose a favorite recipe, I think this might be it. I got the recipe from a fellow church member about 5 years ago and have been making it ever since. It has a beautiful, shiny outer crust that is fabulous to dip in any kind of soup or pasta dish. It freezes like a dream and I have used the dough to make all kinds of other things. Pizza dough, Cal zone dough, Pepperoni Wraps, Sandwich Loafs, and more. I will be posting all of these ways to use this wonderful recipe in days to come!
I can usually make a batch in about 90 minutes 
(depending on how many folks need help with homework and practicing!)
I can fit a double batch in my large sized Kitchen Aid, but I always use my Bosch when I triple or quadruple the recipe.
Give it a try!
Don't be afraid of yeast.
You and yeast can be good friends, I promise!


Fabulous French Bread
Time: 90 minutes
Yield: 3 loaves
Recipe from Krista Robinson
1 T shortening
1 T salt
2 T sugar
1 C boiling water
1 C cold water
1/3 C lukewarm water
1 T yeast (I use active dry)
5 - 6 C white all purpose flour
1 egg

1. Place the 1 C hot water in the microwave for 3 minutes to get it boiling.
2. Dissolve the yeast into the warm water. Stir it around until it is all mixed.
3. Combine the salt, shortening, and sugar in the bottom of your mixer with a fork. The dough hook doesn't work very well. You need to smash up the mixture until it resembles the picture above.
4. Pour the boiling water over the shortening mixture.
5. Pour the cold water over the mixture.
6. Pour the warm water and yeast into the mixer.
7. Begin to add the flour, one cup at a time, until the dough pulls away from the side of your mixer...see the picture below.
8. Let the dough mix on high for 8 minutes.
9. Let the dough rise in the mixer for about 20 minutes. (This step can actually be skipped if you are in a hurry!)


10. Separate the dough into three parts and place on a large jelly roll pan sprayed with cooking spray. Let the dough sit for about 5 minutes. Letting it sit will make it MUCH easier to shape.
11. Spread the dough out (on the jelly roll pan) as pictured below.
12. Then roll the dough up like this.
13. Then bring the ends over and layer them on top of each other.
14. Turn the loaf so the seam side is down. Repeat these steps with the other 2 parts of dough.

15. Spray a sharp knife with cooking spray.


16. Make your egg wash by whisking the egg until frothy.
17. Cut three diagonal slits in the top of each loaf. Cover with the egg wash being sure to get it into all of the slits.
18. Place the loaves in a warm 170 degree oven and let rise for about 15 minutes.
19. Turn the oven up to 375 degrees for a convection oven, and 400 degrees for a regular oven. Leave the loaves in while the oven increases in temperature.
20. Bake for 10 minutes convection or 15 regular oven, or until the loaves are golden brown and crusty.
21. Turn the oven down to 325 for convection, 350 for regular and turn the pan around in the oven. Bake for another 7 minutes convection or 10 minutes for regular.
THE END....that was like writing a short novel! It has a lot of steps but as I said before, this bread is worth it. We love it. My  kids like to pass it around the neighborhood to their friends when I make it. Sometimes they even come and knock on the door when they can smell it baking, just to be sure they are going to get a slice....or a loaf! They can really pack it away in a quick hurry! (Thus the reason for tripling and quadrupling the recipe!)